DjangoにはBootstrapを扱うためのモジュールが用意されており、簡単かつわかりやすいコードでBootstrapを使うことができます。
※この記事では弊サイトの Django入門編 を終えている前提で進めます。また、機能の実装先もDjango入門編で制作した掲示板アプリをベースに進めていきます。
目次
django-bootstrap5とは
django-bootstrap5はその名のとおりDjangoでBootstrapを使うためのモジュールです。
DjangoでBootstrapを使うにはHTMLテンプレートのheadタグ内にBootstrapの読み込みタグを追加してもいいのですが、Djangoにはフォームを動的に生成する機能などが備わっているため直接タグ付けしづらい部品も存在します。
django-bootstrap5を使えば独自のテンプレートタグを利用してこうした動的に生成している部品にもBootstrapを適用できるほか、短く簡単な記述でBootstrapを適用した部品を配置できます。
また、このモジュールはJavaScriptやBootstrapのCSSといった依存コンテンツを含むため、簡単にbootstrapの環境を構築できます。Bootstrapの読み込みコードも短く可読性が高いテンプレートタグで書くことができます。
django-bootstrap5のインストールと設定
使用している環境にdjango-bootstrap5をインストールします。
pip install django-bootstrap5
次にsettings.pyのINSTALLED_APPSにdjango_bootstrap5を追加します。
INSTALLED_APPS = [
    ...
    'django_bootstrap5', # 追加
]
次に、django-bootstrap5を利用するすべてのHTMLテンプレートに次のテンプレートタグを記述します。
{% load django_bootstrap5 %}<!-- django-bootstrap5のカスタムテンプレートタグの読み込み -->
最後にテンプレートのheadタグ内にBootstrapのCSSとJavaScriptを読み込むためのテンプレートタグを追記します。
例えばheadタグが共通テンプレートのbase.htmlに記述されているなら次のように編集しましょう。
{% load django_bootstrap5 %}<!-- カスタムテンプレートタグの読み込み -->

<!DOCTYPE html>
<html lang="ja">
  <head>
    <meta charset="utf-8">
    {% bootstrap_css %}<!-- BootstrapのCSSの読み込み -->
    {% bootstrap_javascript %}<!-- JavaScriptの読み込み -->
    <title>Djangoを使ってみよう!</title>
  </head>
  <body>
    {% block content %}
    {% endblock %}
  </body>
</html>
これでBootstrapとdjango_bootstrap5のテンプレートタグが使用できるようになりました。
Django Bootstrap5のテンプレートタグには次のようなものがあります。
- bootstrap_form: Bootstrap5スタイルでフォームを表示します
- bootstrap_button: Bootstrap5スタイルでボタンを表示します
- bootstrap_alert: アラートメッセージをBootstrap5スタイルで表示します
投稿一覧ページをデザインしてみよう
では実際に投稿一覧ページをBootstrapを使ってデザインしてみましょう。
まずはbase.htmlを編集してコンテンツ部分全体をcontainerクラスで囲います。
# 前略
  <body>
    <div class="container">
    {% block content %}
    {% endblock %}
    </div>
  </body>
</html>
次にindex.htmlです。次のようにBootstrapで定義されているクラスとdjango-bootstrap5のテンプレートタグを使ってページをデザインします。
{% extends "base.html" %}
{% load django_bootstrap5 %}<!-- カスタムテンプレートタグの読み込み -->

{% block content %}
  <h1 class="mt-5">CRUDアプリを作ってみよう</h1><!-- クラスを設定 -->
  {% for article in object_list %}
    <div class="card bg-light shadow-sm mt-3"><!-- クラスを設定 -->
      <div class="card-body"><!-- クラスを設定 -->
        <p>{{ article.id }}:{{ article.author }}:{{ article.created_at }}</p>
        <p><a href='{% url "bbs:detail" article.id %}'>{{ article.content }}</a></p>
      </div>
    </div>
  {% endfor %}

  <!-- 新規投稿ページへのリンク -->
  <div class="mt-3"><!-- クラスを設定 -->
    <a href="{% url 'bbs:create' %}">
      {% bootstrap_button button_type="submit" content="新規投稿" size="md" %}<!-- テンプレートタグでボタンを設置 -->
    </a>
  </div>
{% endblock %}
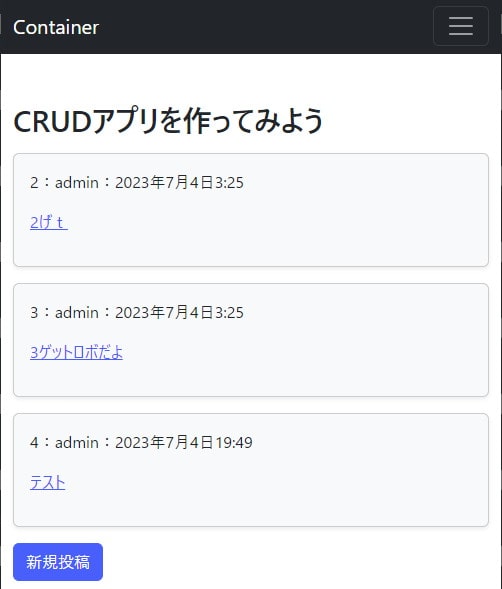
これだけです!確認してみましょう。Djangoコマンドでサーバーを起動し、http://127.0.0.1:8000/bbsにアクセスします。
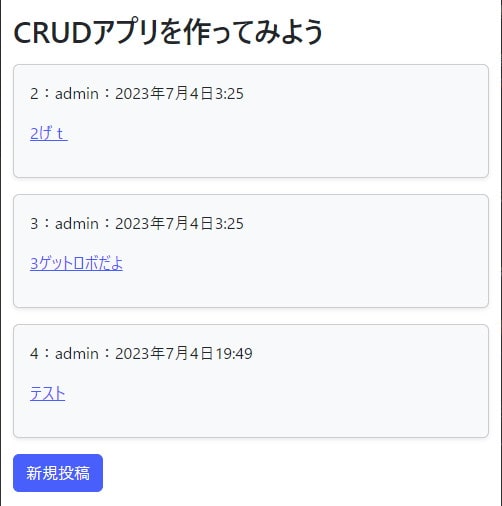
だいぶそれっぽい見た目になりました。
ナビバーも付けてみましょう。Bootstrap公式のサンプルページにアクセスして気に入ったデザインのコードをコピペします。
https://getbootstrap.jp/docs/5.0/examples/
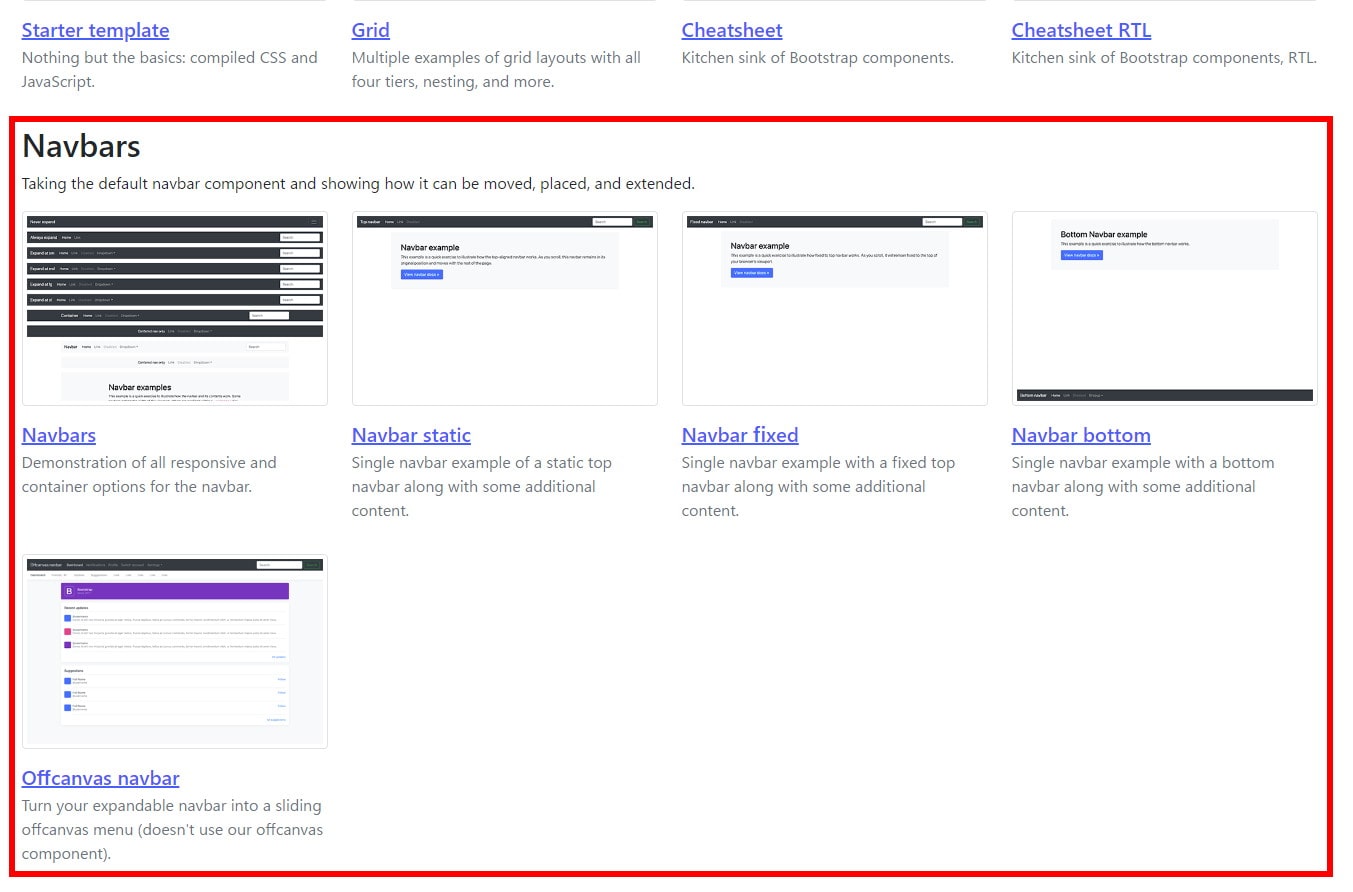
ナビバーのサンプルから気に入ったものを選択して
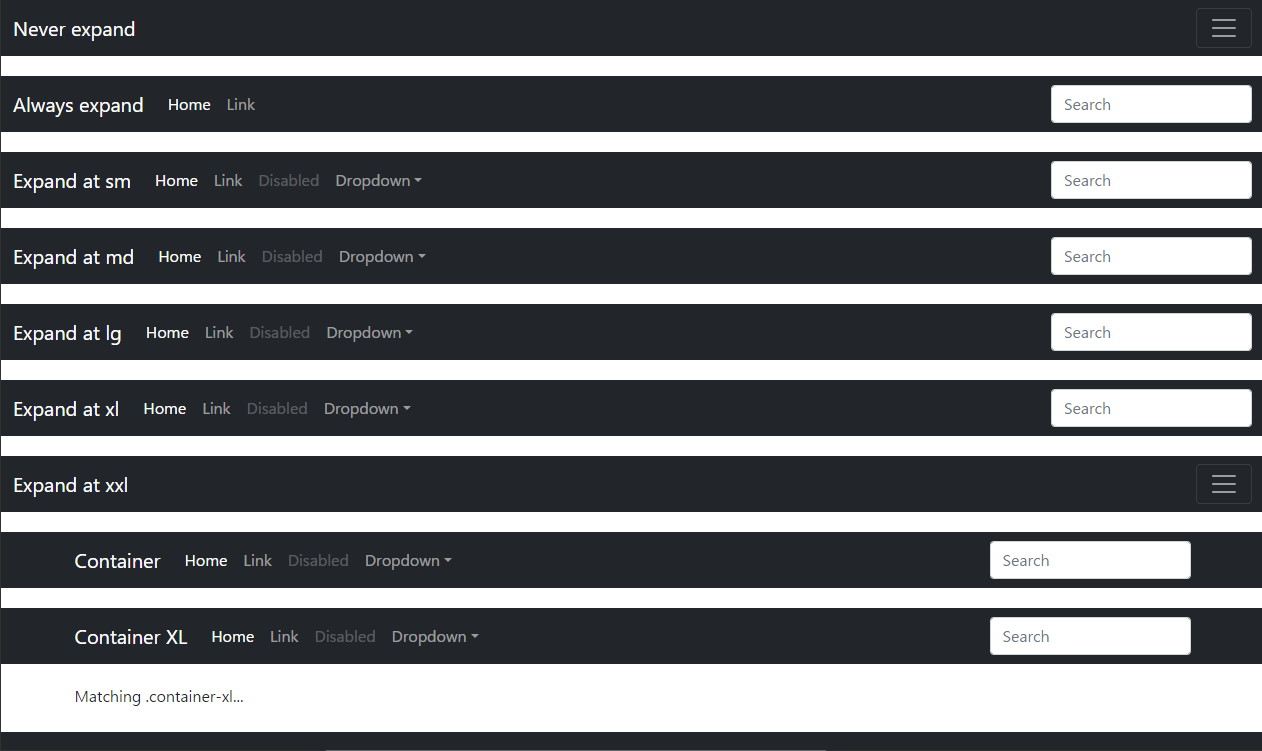
たくさんナビバーが置いてあるこのページから選びましょう。
右クリック→ページのソースを表示でソースコードを表示します。
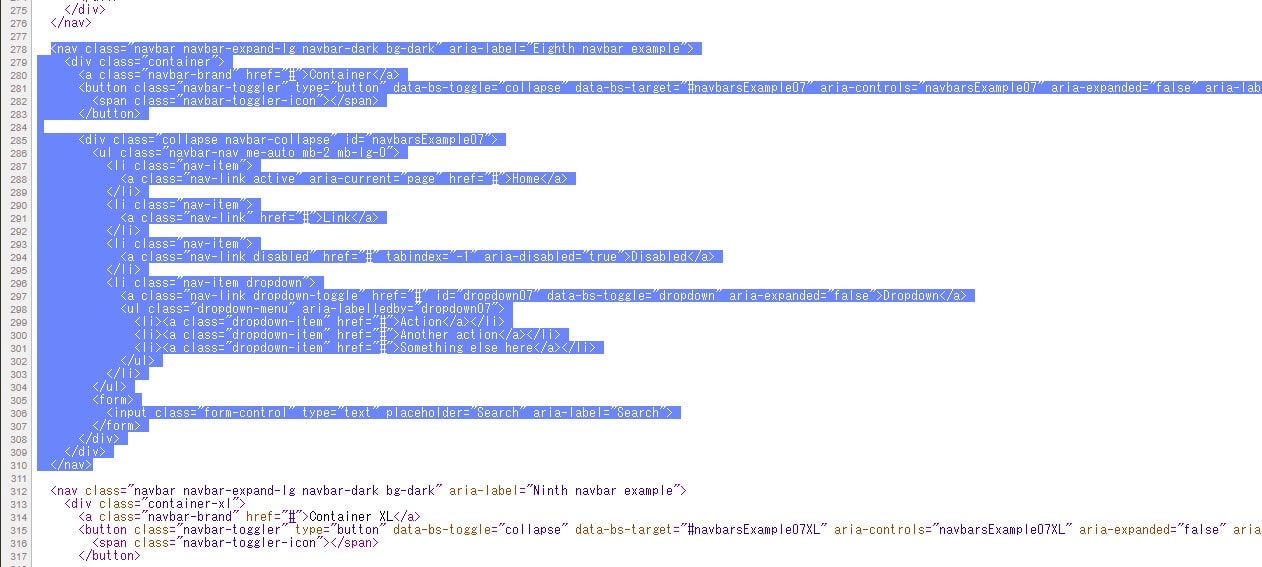
気に入ったナビバーのソースコードをコピーして、base.htmlのナビバーを置きたい場所に貼り付けます。
{% load django_bootstrap5 %}<!-- カスタムテンプレートタグの読み込み -->

<!DOCTYPE html>
<html lang="ja">
  <head>
    <meta charset="utf-8">
    {% bootstrap_css %}<!-- BootstrapのCSSの読み込み -->
    {% bootstrap_javascript %}<!-- BootstrapのJavaScriptの読み込み -->
    <title>Djangoを使ってみよう!</title>
  </head>
  <body>
    <nav class="navbar navbar-expand-lg navbar-dark bg-dark" aria-label="Eighth navbar example">
      <div class="container">
        <a class="navbar-brand" href="#">Container</a>
        <button class="navbar-toggler" type="button" data-bs-toggle="collapse" data-bs-target="#navbarsExample07" aria-controls="navbarsExample07" aria-expanded="false" aria-label="Toggle navigation">
          <span class="navbar-toggler-icon"></span>
        </button>

        <div class="collapse navbar-collapse" id="navbarsExample07">
          <ul class="navbar-nav me-auto mb-2 mb-lg-0">
            <li class="nav-item">
              <a class="nav-link active" aria-current="page" href="#">Home</a>
            </li>
            <li class="nav-item">
              <a class="nav-link" href="#">Link</a>
            </li>
            <li class="nav-item">
              <a class="nav-link disabled" href="#" tabindex="-1" aria-disabled="true">Disabled</a>
            </li>
            <li class="nav-item dropdown">
              <a class="nav-link dropdown-toggle" href="#" id="dropdown07" data-bs-toggle="dropdown" aria-expanded="false">Dropdown</a>
              <ul class="dropdown-menu" aria-labelledby="dropdown07">
                <li><a class="dropdown-item" href="#">Action</a></li>
                <li><a class="dropdown-item" href="#">Another action</a></li>
                <li><a class="dropdown-item" href="#">Something else here</a></li>
              </ul>
            </li>
          </ul>
          <form>
            <input class="form-control" type="text" placeholder="Search" aria-label="Search">
          </form>
        </div>
      </div>
    </nav>
    <div class="container">
    {% block content %}
    {% endblock %}
    </div>
  </body>
</html>
あらためて確認してみましょう。Djangoコマンドでサーバーを起動し、http://127.0.0.1:8000/bbsにアクセスします。
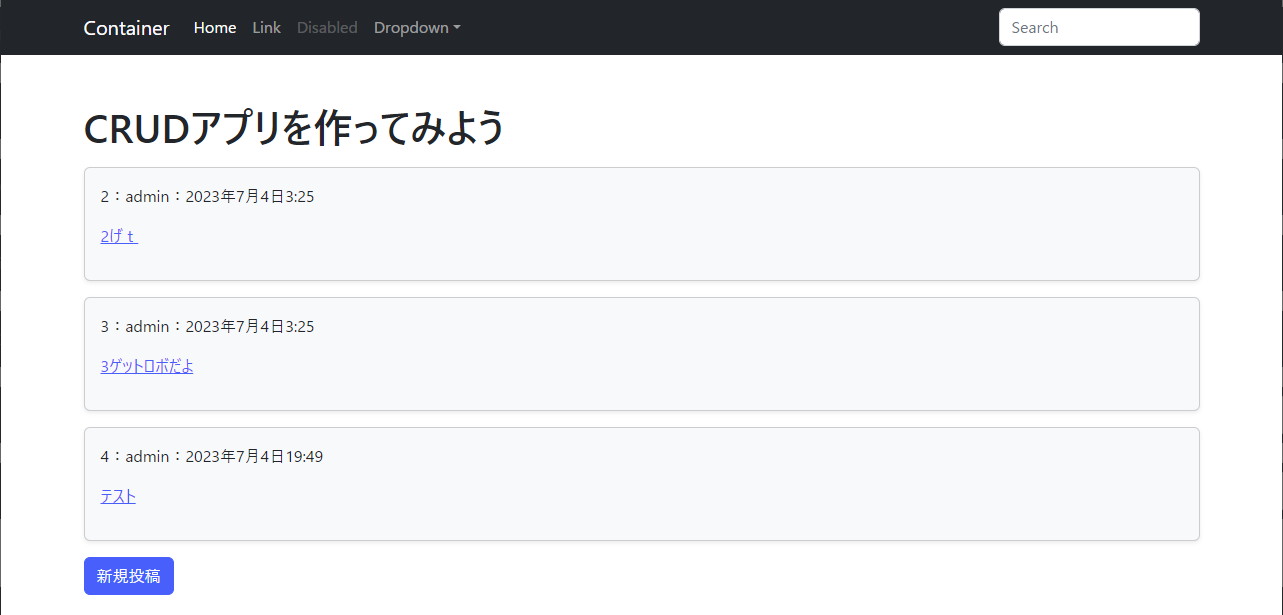
だいぶそれっぽい感じになりました。
もちろんBootstrapはレスポンシブ対応なので画面を縮小したり拡大しても画面幅に応じて自動的に表示を調整してくれます。
ナビバーにある各リンクは設定していませんし、検索フォームもこのままでは機能しませんが、DjangoアプリにBootstrapを適用してデザインする流れはわかって頂けたかと思います。
では、同様に他のページもデザインしてみましょう。
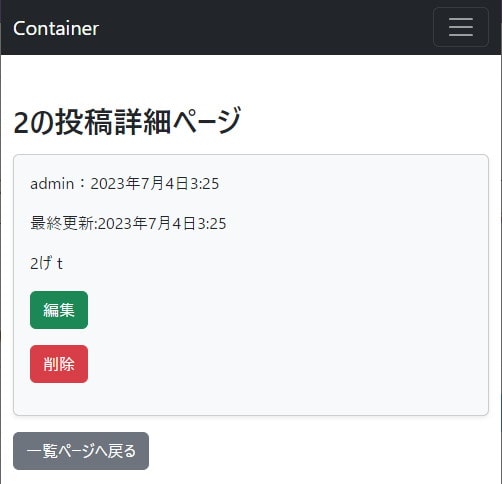
投稿詳細ページ
detail.htmlを次のように修正します。
{% extends "base.html" %}
{% load django_bootstrap5 %}<!-- カスタムテンプレートタグの読み込み -->

{% block content %}
    <h1 class="mt-5">{{ article.id }}の投稿詳細ページ</h1><!-- クラスを設定 -->
    <div class="card bg-light shadow-sm mt-3"><!-- クラスを設定 -->
      <div class="card-body"><!-- クラスを設定 -->
        <p>{{ article.author }}:{{ article.created_at }}</p>
        <p>最終更新:{{ article.updated_at }}</p>
        <p>{{ article.content }}</p>
        <p><a href='{% url "bbs:update" article.pk %}'>{% bootstrap_button button_type="submit" button_class="btn-success" content="編集" size="md" %}<!-- テンプレートタグでボタンを設置 --></a></p>
        <p><a href='{% url "bbs:delete" article.pk %}'>{% bootstrap_button button_type="submit" button_class="btn-danger" content="削除" size="md" %}<!-- テンプレートタグでボタンを設置 --></a></p>
      </div>
    </div>
    <div class="mt-3"><!-- クラスを設定 -->
      <a href='{% url "bbs:index" %}'>{% bootstrap_button button_type="submit" button_class="btn-secondary" content="一覧ページへ戻る" size="md" %}<!-- テンプレートタグでボタンを設置 --></a>
    </div>
{% endblock %}
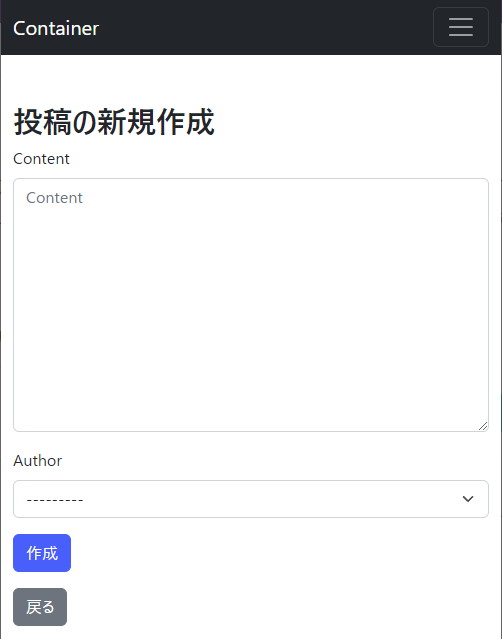
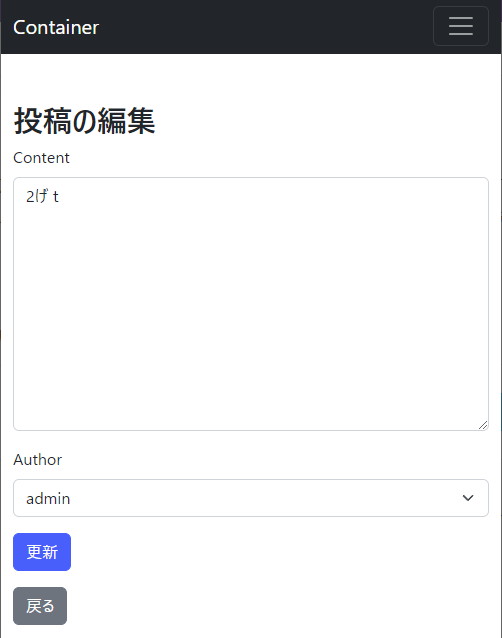
新規投稿 / 投稿編集ページ
create.htmlを次のように修正します。
{% extends 'base.html' %}
{% load django_bootstrap5 %}<!-- カスタムテンプレートタグの読み込み -->

{% block content %}

<h1 class="mt-5">投稿の{{ object|yesno:'編集,新規作成'}}</h1><!-- クラスを設定 -->

<form action='' method='post'>{% csrf_token %}
    {% bootstrap_form form %}<!-- テンプレートタグでフォームを設置 -->
    {% bootstrap_button button_type="submit" content=object|yesno:"更新,作成" size="md" %}<!-- テンプレートタグでボタンを設置 -->
</form>

<div class="mt-3"><!-- クラスを設定 -->
  <a href='{% url "bbs:index" %}'>{% bootstrap_button button_type="submit" button_class="btn-secondary" content="戻る" size="md" %}<!-- テンプレートタグでボタンを設置 --></a>
</div>

{% endblock %}
投稿削除ページ
delete.htmlを次のように修正します。
{% extends 'base.html' %}
{% load django_bootstrap5 %}<!-- カスタムテンプレートタグの読み込み -->

{% block content %}

<h1 class="mt-5">投稿の削除</h1>
<p>'{{ object.id }}'の投稿を削除しますか?</p>
<form action='' method='post'>{% csrf_token %}
  {% bootstrap_button button_type="submit" button_class="btn-danger" content="削除" size="md" %}<!-- テンプレートタグでボタンを設置 -->
</form>
<div class="mt-3"><!-- クラスを設定 -->
  <a href='{% url "bbs:index" %}'>{% bootstrap_button button_type="submit" button_class="btn-secondary" content="戻る" size="md" %}<!-- テンプレートタグでボタンを設置 --></a>
</div>

{% endblock %}
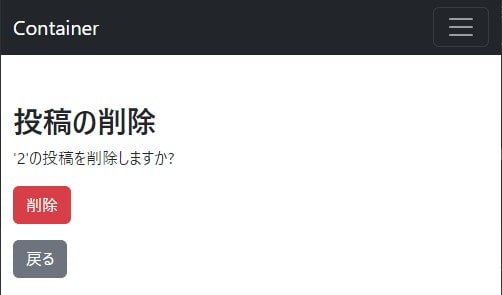
良さそうですね。
このようにBootstrapを使えば簡単にWebアプリケーションの見栄えを整えることができます。