Tkinterのボタン(Button)ウィジェットの使い方について解説します。ボタン(Button)は文字や画像を表示し、その名の通りユーザーがマウスでクリックすることでそのボタンを「オン」にすることができるウィジェットです。
目次
ボタン(Button)ウィジェットの生成
ButtonはTkinterのウィジェットクラスの1つで、マウスでクリックすることで状態を「オン」にすることができるボタンを生成できます。
Buttonウィジェットを生成して配置するには他のウィジェット同様次のように記述します。
import tkinter as tk

 # tk.Frameを継承したApplicationクラスを作成
class Application(tk.Frame):
    def __init__(self, master=None):
        super().__init__(master)

        # ウィンドウの設定
        self.master.title("ウィンドウのタイトル")

        # 実行内容
        self.pack()
        self.create_widget()

    # create_widgetメソッドを定義
    def create_widget(self):

        # label1ウィジェットを作成
        self.label1 = tk.Label(self.master, text="「スイッチ」を押させるなーーーーッ")
        self.label1.pack()

        # button1ウィジェットを作成
        self.button1 = tk.Button(self.master ,text="いいや!限界だ押すね!") # button1に表示したい文字を渡してインスタンスを生成
        self.button1.pack() # button1ウィジェットを配置

if __name__ == "__main__":
    root = tk.Tk()
    app = Application(master=root)
    app.mainloop()
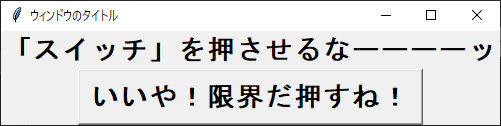
このように出っ張っていて押すとへこむボタンを作成することができます。
ボタン(Button)が押された時の処理
このボタンにはまだ「押された時の処理」を定義していないため、押すとへこむ以外の機能はありません。
ボタンを押した時の処理を追加するにはButtonを作成する際、command引数に処理内容を渡すよう記述します。
import tkinter as tk

 # tk.Frameを継承したApplicationクラスを作成
class Application(tk.Frame):
    def __init__(self, master=None):
        super().__init__(master)

        # ウィンドウの設定
        self.master.title("ウィンドウのタイトル")

        # 実行内容
        self.pack()
        self.create_widget()

    # create_widgetメソッドを定義
    def create_widget(self):

        # label1ウィジェット
        self.label1 = tk.Label(self.master, text="「スイッチ」を押させるなーーーーッ")
        self.label1.pack()

        # button1ウィジェット
        self.button1 = tk.Button(self.master, text="いいや!限界だ押すね!", command=self.button1_clicked) # command引数にbutton1_clicked関数を渡す
        self.button1.pack() # button1ウィジェットを配置

    # button1をクリックした時の処理
    def button1_clicked(self):
        app.quit() # メインループの終了

if __name__ == "__main__":
    root = tk.Tk()
    app = Application(master=root)
    app.mainloop()
23行目でbutton1インスタンスを作成する際にオプション引数commandにbutton1_clicked関数を指定し、26行目から28行目でボタンを押した時の処理をbutton1_clicked関数として定義しています。
28行目で使用しているquit() は全てのウィジェットに実装されているユニバーサルメソッドのひとつです。
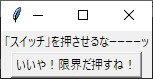
表示されるウィンドウは先ほどとおなじですが、今度はボタンをクリックするとアプリケーションが終了します。
ボタン(Button)で使えるオプション引数
Buttonウィジェットを作成する際は次のオプション引数を使用することができます。
| 属性 | 説明 | 値 |
|---|---|---|
| anchor | ボタン上のテキストの位置 |
tk.CENTER(中央) tk.W(左寄せ) tk.E(右寄せ) tk.N(上寄せ) tk.S(下寄せ) tk.NW(左上) tk.SW(左下) tk.NE(右上) tk.SE(右下) |
| bd or borderwidth | ボーダーの幅を指定します | 数値(ピクセル単位) |
| bg or background | ボタンの背景色を指定します | red,blue,grayなど |
| bitmap | ボタンに表示する bitmap を指定します | |
| command | ボタンを押した時に呼ばれる関数を指定します | 関数名 |
| cursor | カーソルの形を指定します | |
| default | ボタンの状態の初期値 | tk.NORMAL(通常) tk.DISABLED(押せないボタン) |
| disabledforeground | ボタンが押せない状態のときの文字色 | red,blue,grayなど |
| fg or foreground | フォントの色を指定します | |
| font | テキストのフォントの種類や大きさを指定します | フォント名、文字の大きさ(数値)など |
| height | ボタンの高さを指定します | 数値(テキストの場合は行単位、画像の場合はピクセル単位) |
| image | ボタンに貼る画像ファイルを指定します | 画像ファイルへのパス |
| justify | テキストが複数行にわたる場合、左寄せ、右寄せ、中央寄せを指定します | |
| padx | 横の余白 | 数値(ピクセル単位) |
| pady | 縦の余白 | 数値(ピクセル単位) |
| relief | ボーダー部分の浮き彫りを指定します | flat,raised,sunken,groove,ridge |
| state | ボタンの状態を指定 | tk.NORMAL(通常) tk.DISABLED(押せないボタン) tk.pressed(押したまま) |
| text | 表示する文字列を指定します | 任意の文字列 |
| textvariable | ボタン上に表示する tk.StringVar() | 変数名 |
| underline | 下線をつける文字の位置を指定 | 数値(n文字目に付ける) |
| width | button の幅 | 数値(テキストの場合は行単位、画像の場合はピクセル単位) |
| wraplength | 改行幅 | 数値(ピクセル単位) |
試しにいくつかのオプションを使って先ほどのコードを変更してみましょう。
import tkinter as tk

 # tk.Frameを継承したApplicationクラスを作成
class Application(tk.Frame):
    def __init__(self, master=None):
        super().__init__(master)

        # ウィンドウの設定
        self.master.title("ウィンドウのタイトル")

        # 実行内容
        self.pack()
        self.create_widget()

    # create_widgetメソッドを定義
    def create_widget(self):

        # label1ウィジェット
        self.label1 = tk.Label(self.master, text="「スイッチ」を押させるなーーーーッ", font=("MSゴシック", "20", "bold"))
        self.label1.pack()

        # button1ウィジェット
        self.button1_text = tk.StringVar() # StringVarクラスから変化可能な文字列を格納できるbutton1_textを生成
        self.button1_text.set("いいや!限界だ押すね!") # button1_textに文字列代入

        self.button1 = tk.Button(self.master, textvariable=self.button1_text, font=("MSゴシック", "20", "bold"), command=self.button1_clicked) # いくつかのオプション引数を設定
        self.button1.pack() # button1ウィジェットを配置

    def button1_clicked(self): # button1をクリックした時の処理
        self.button1_text.set("びろ~~~ん") # button1_textの中身を変更

if __name__ == "__main__":
    root = tk.Tk()
    app = Application(master=root)
    app.mainloop()
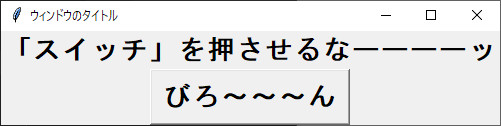
今度はラベルとボタンのテキストを変更したのと、ボタンを押した時にアプリケーションを終了するのではなくボタンに表示されている文字列が変更されるようになりました。